Red Velvet White Chocolate Cookies (Christmas Edition)
A cozy festive bake you’ll want to make every December
There’s something magical about baking when the air smells of pine, fairy lights twinkle, and holiday music fills the kitchen.
If you love the holiday charm of red velvet but prefer something a little creamier and quicker to bake, these Red Velvet White Chocolate Cookies are your perfect match.
They’re buttery, soft, and delicately sweet, and filled with creamy white chocolate that melts right into the dough for a smooth, velvety texture.
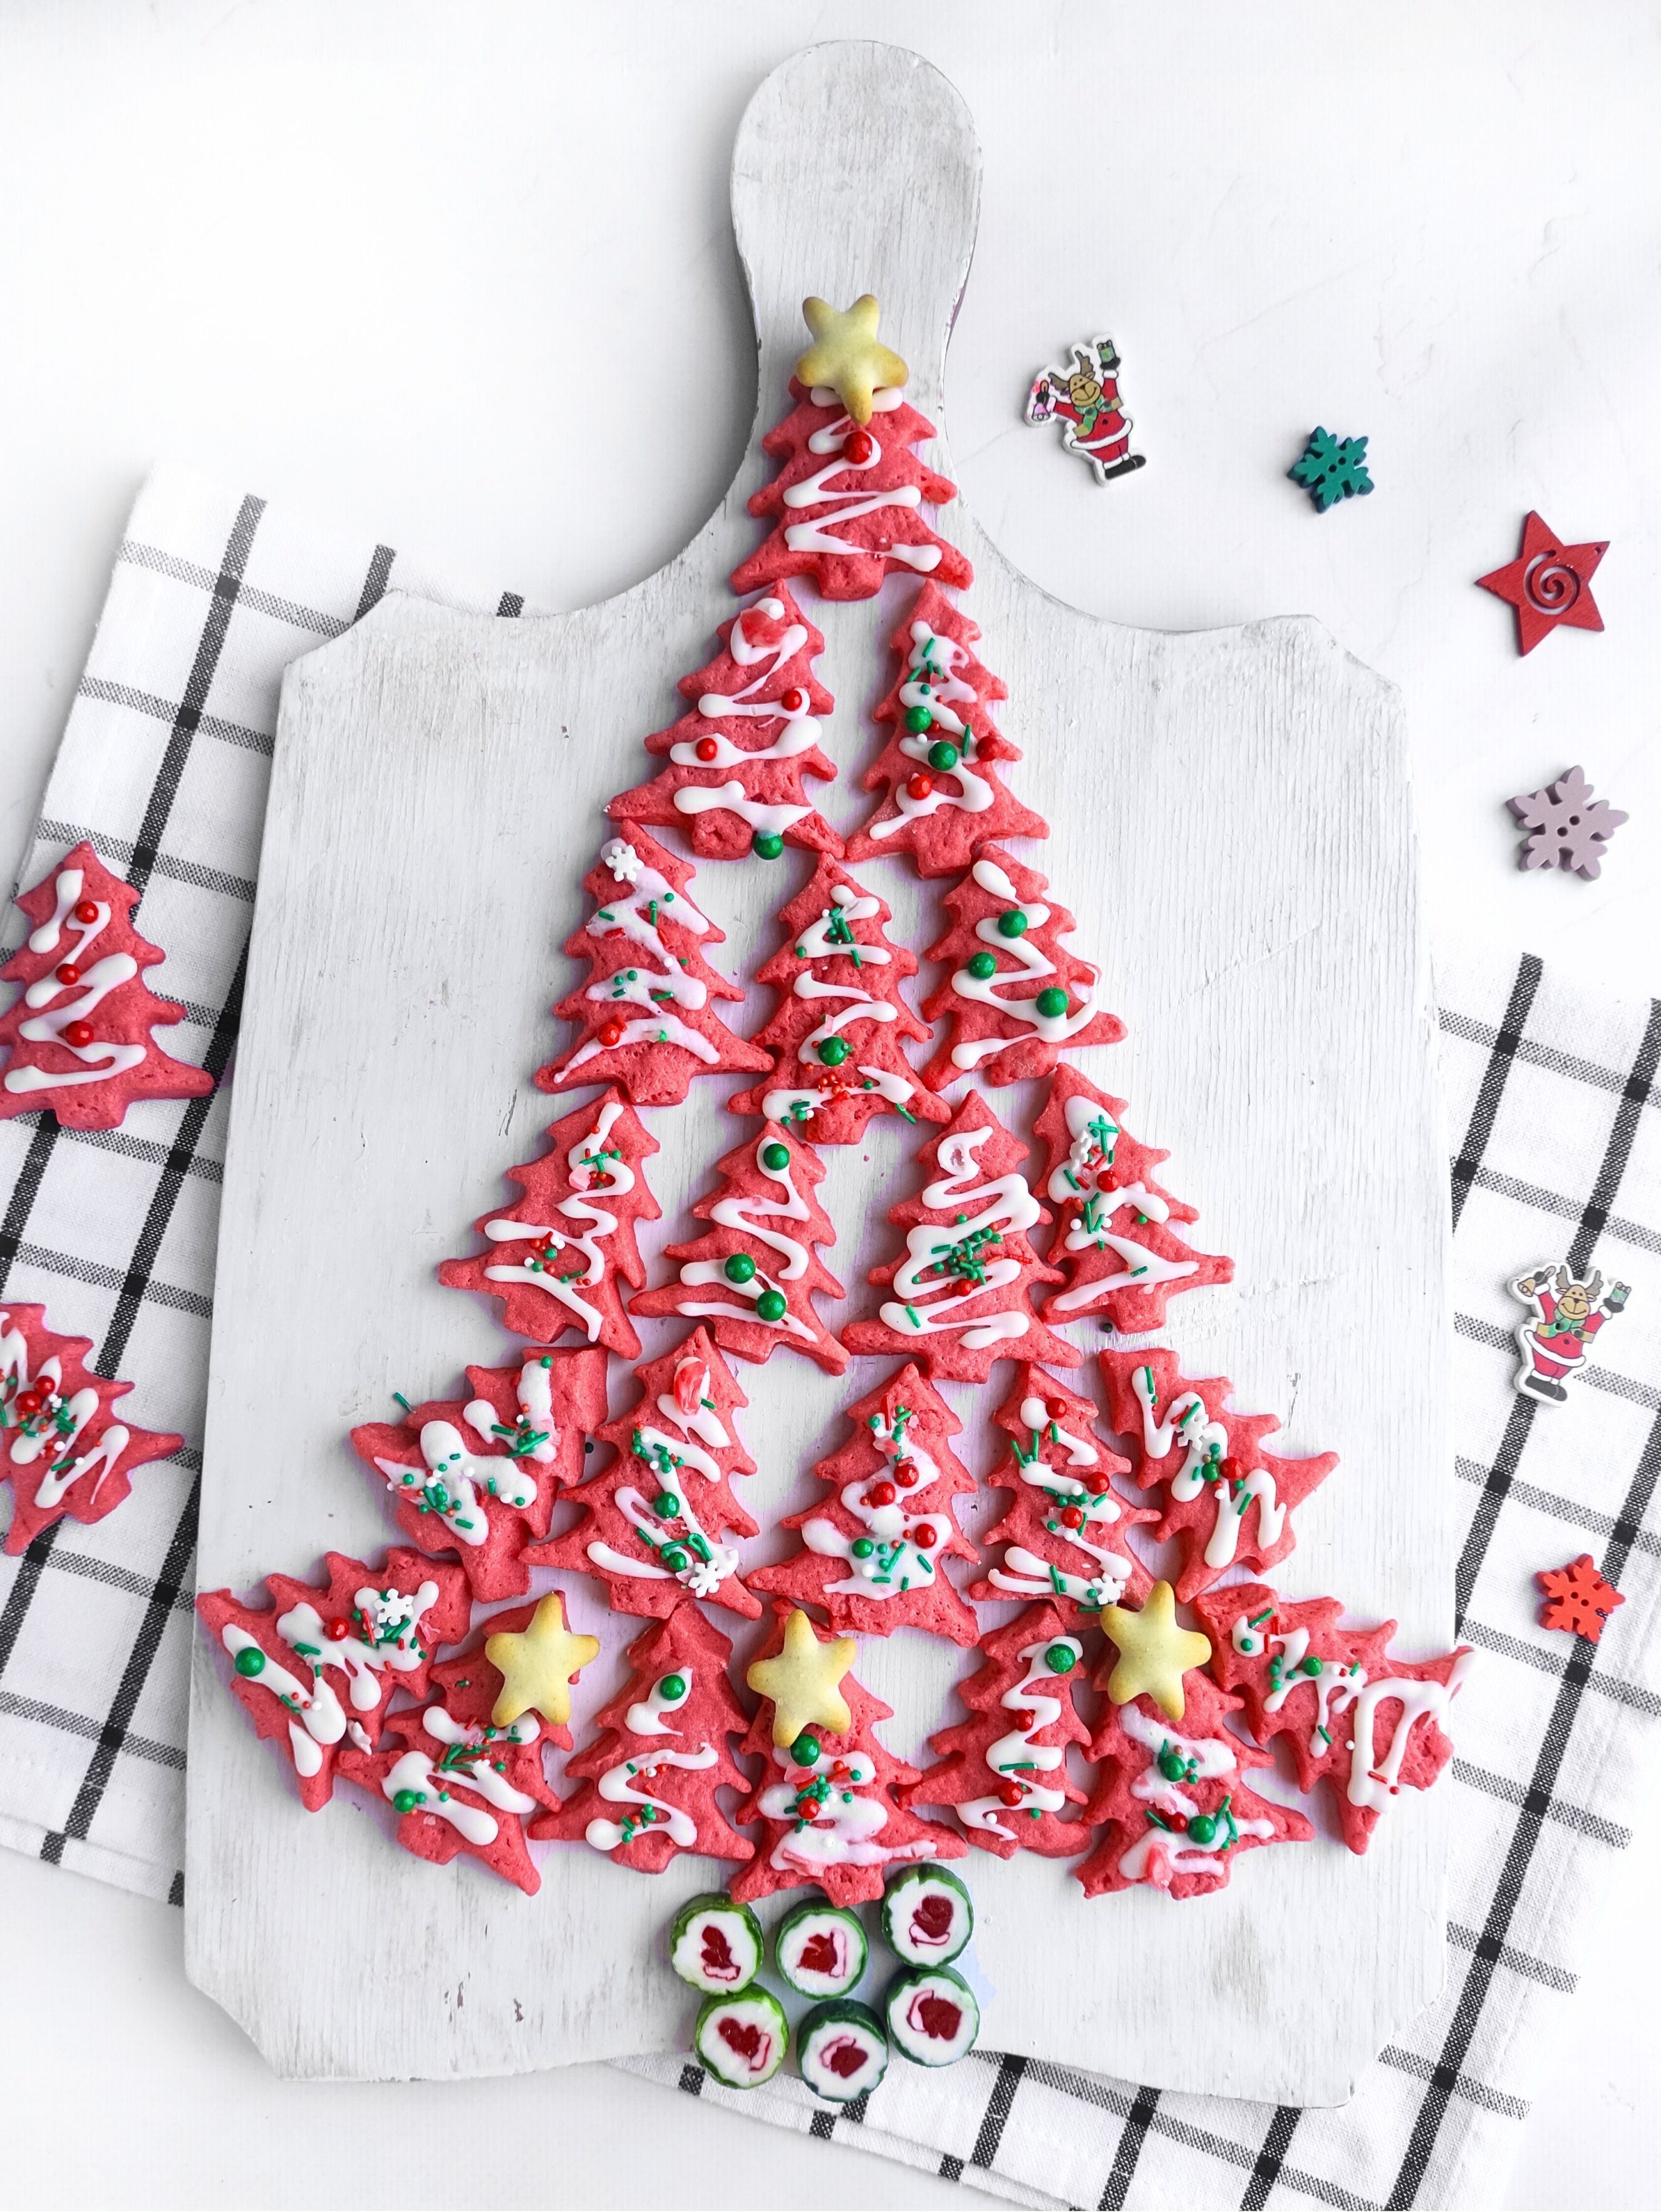
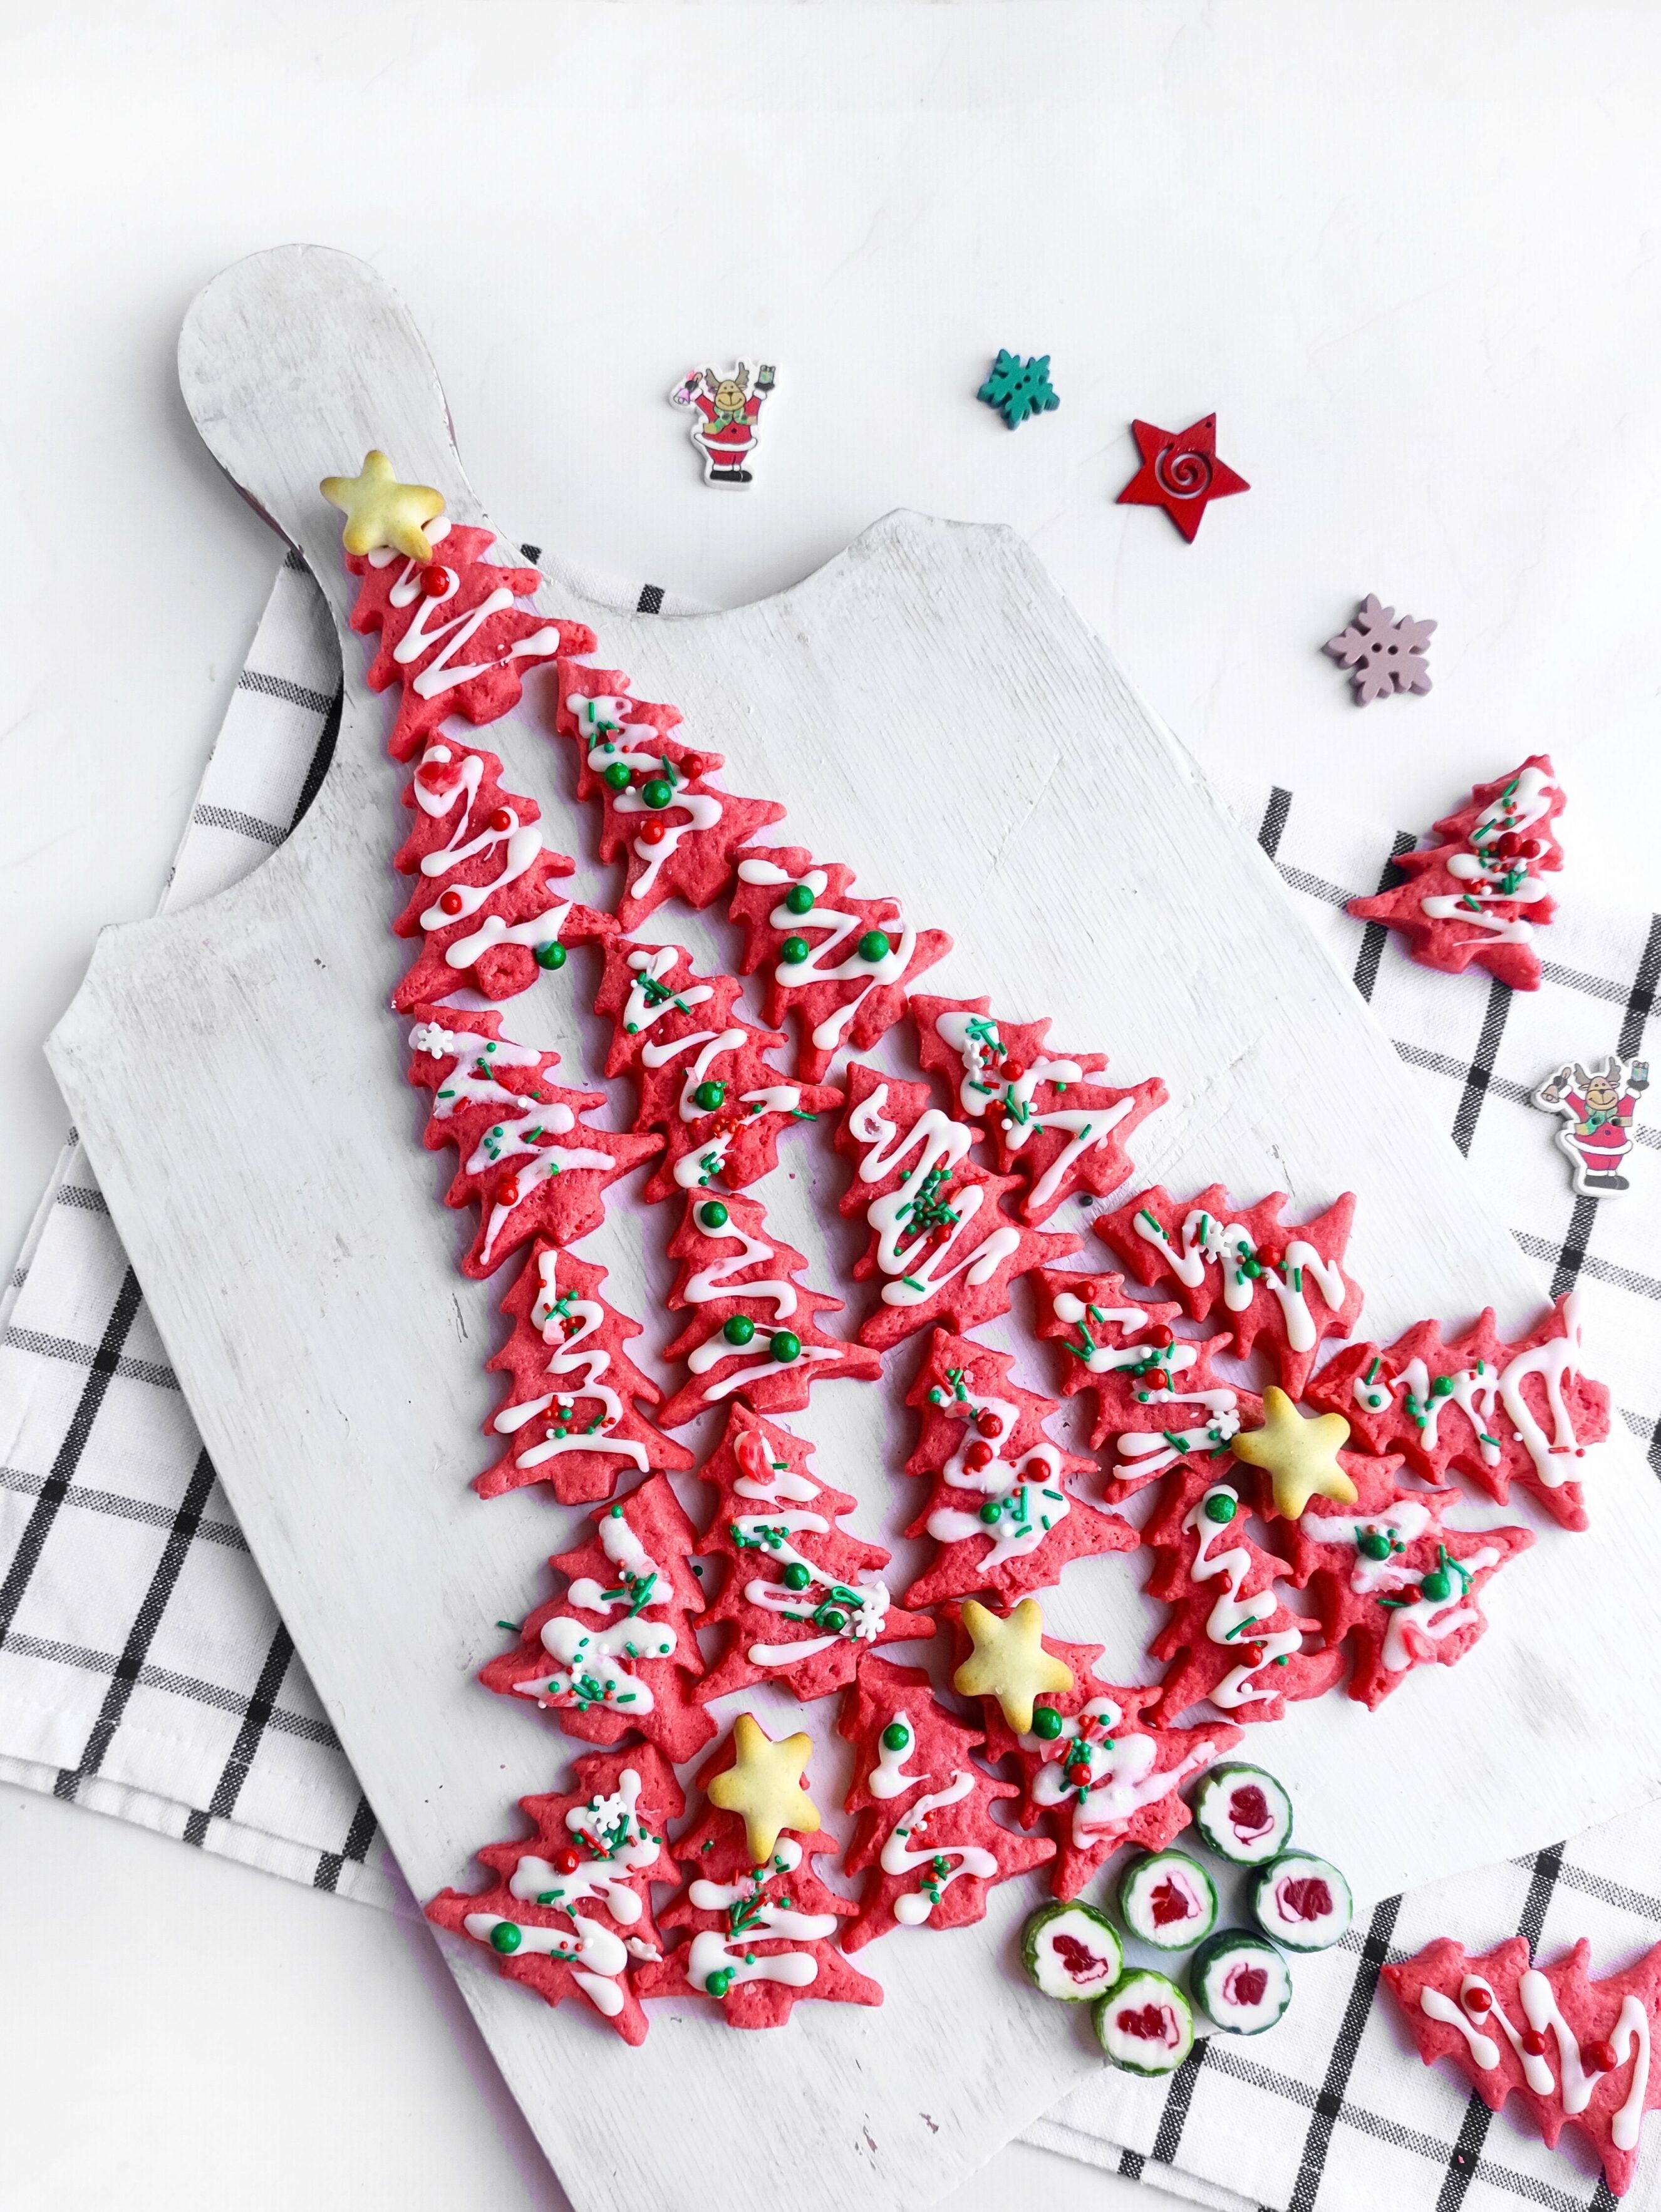
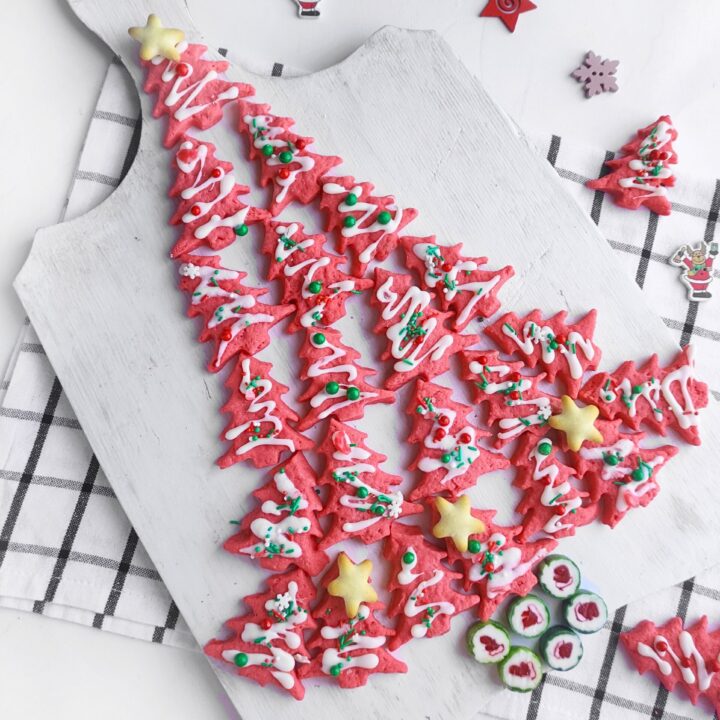
The deep red hue, snowy drizzle, and colorful sprinkles make them feel straight out of a Christmas bakery window.
These cookies are ideal for gifting, decorating with kids, or turning into a stunning Christmas tree cookie display.
Even though they skip the traditional cocoa, the rich white chocolate gives them a melt-in-your-mouth flavor that’s just as indulgent and festive.
Why You’ll Love These Red Velvet Cookies
- A festive twist on red velvet – the cookies skip cocoa powder and use melted white chocolate for a smooth, creamy flavor and that gorgeous red hue.
- Soft and buttery – each bite melts in your mouth, with a light, tender texture.
- No fancy tools needed – just mix, roll, and bake. Perfect even for beginner bakers.
- Decorating fun for kids – drizzle with white chocolate “snow,” add sprinkles, and create your own edible Christmas tree.
- Picture-perfect for gifting – bright red color, glossy white drizzle, and minty candy shards make them look straight out of a bakery box.
- Quick and fuss-free – no chilling time or complicated steps, just simple ingredients and big festive payoff.
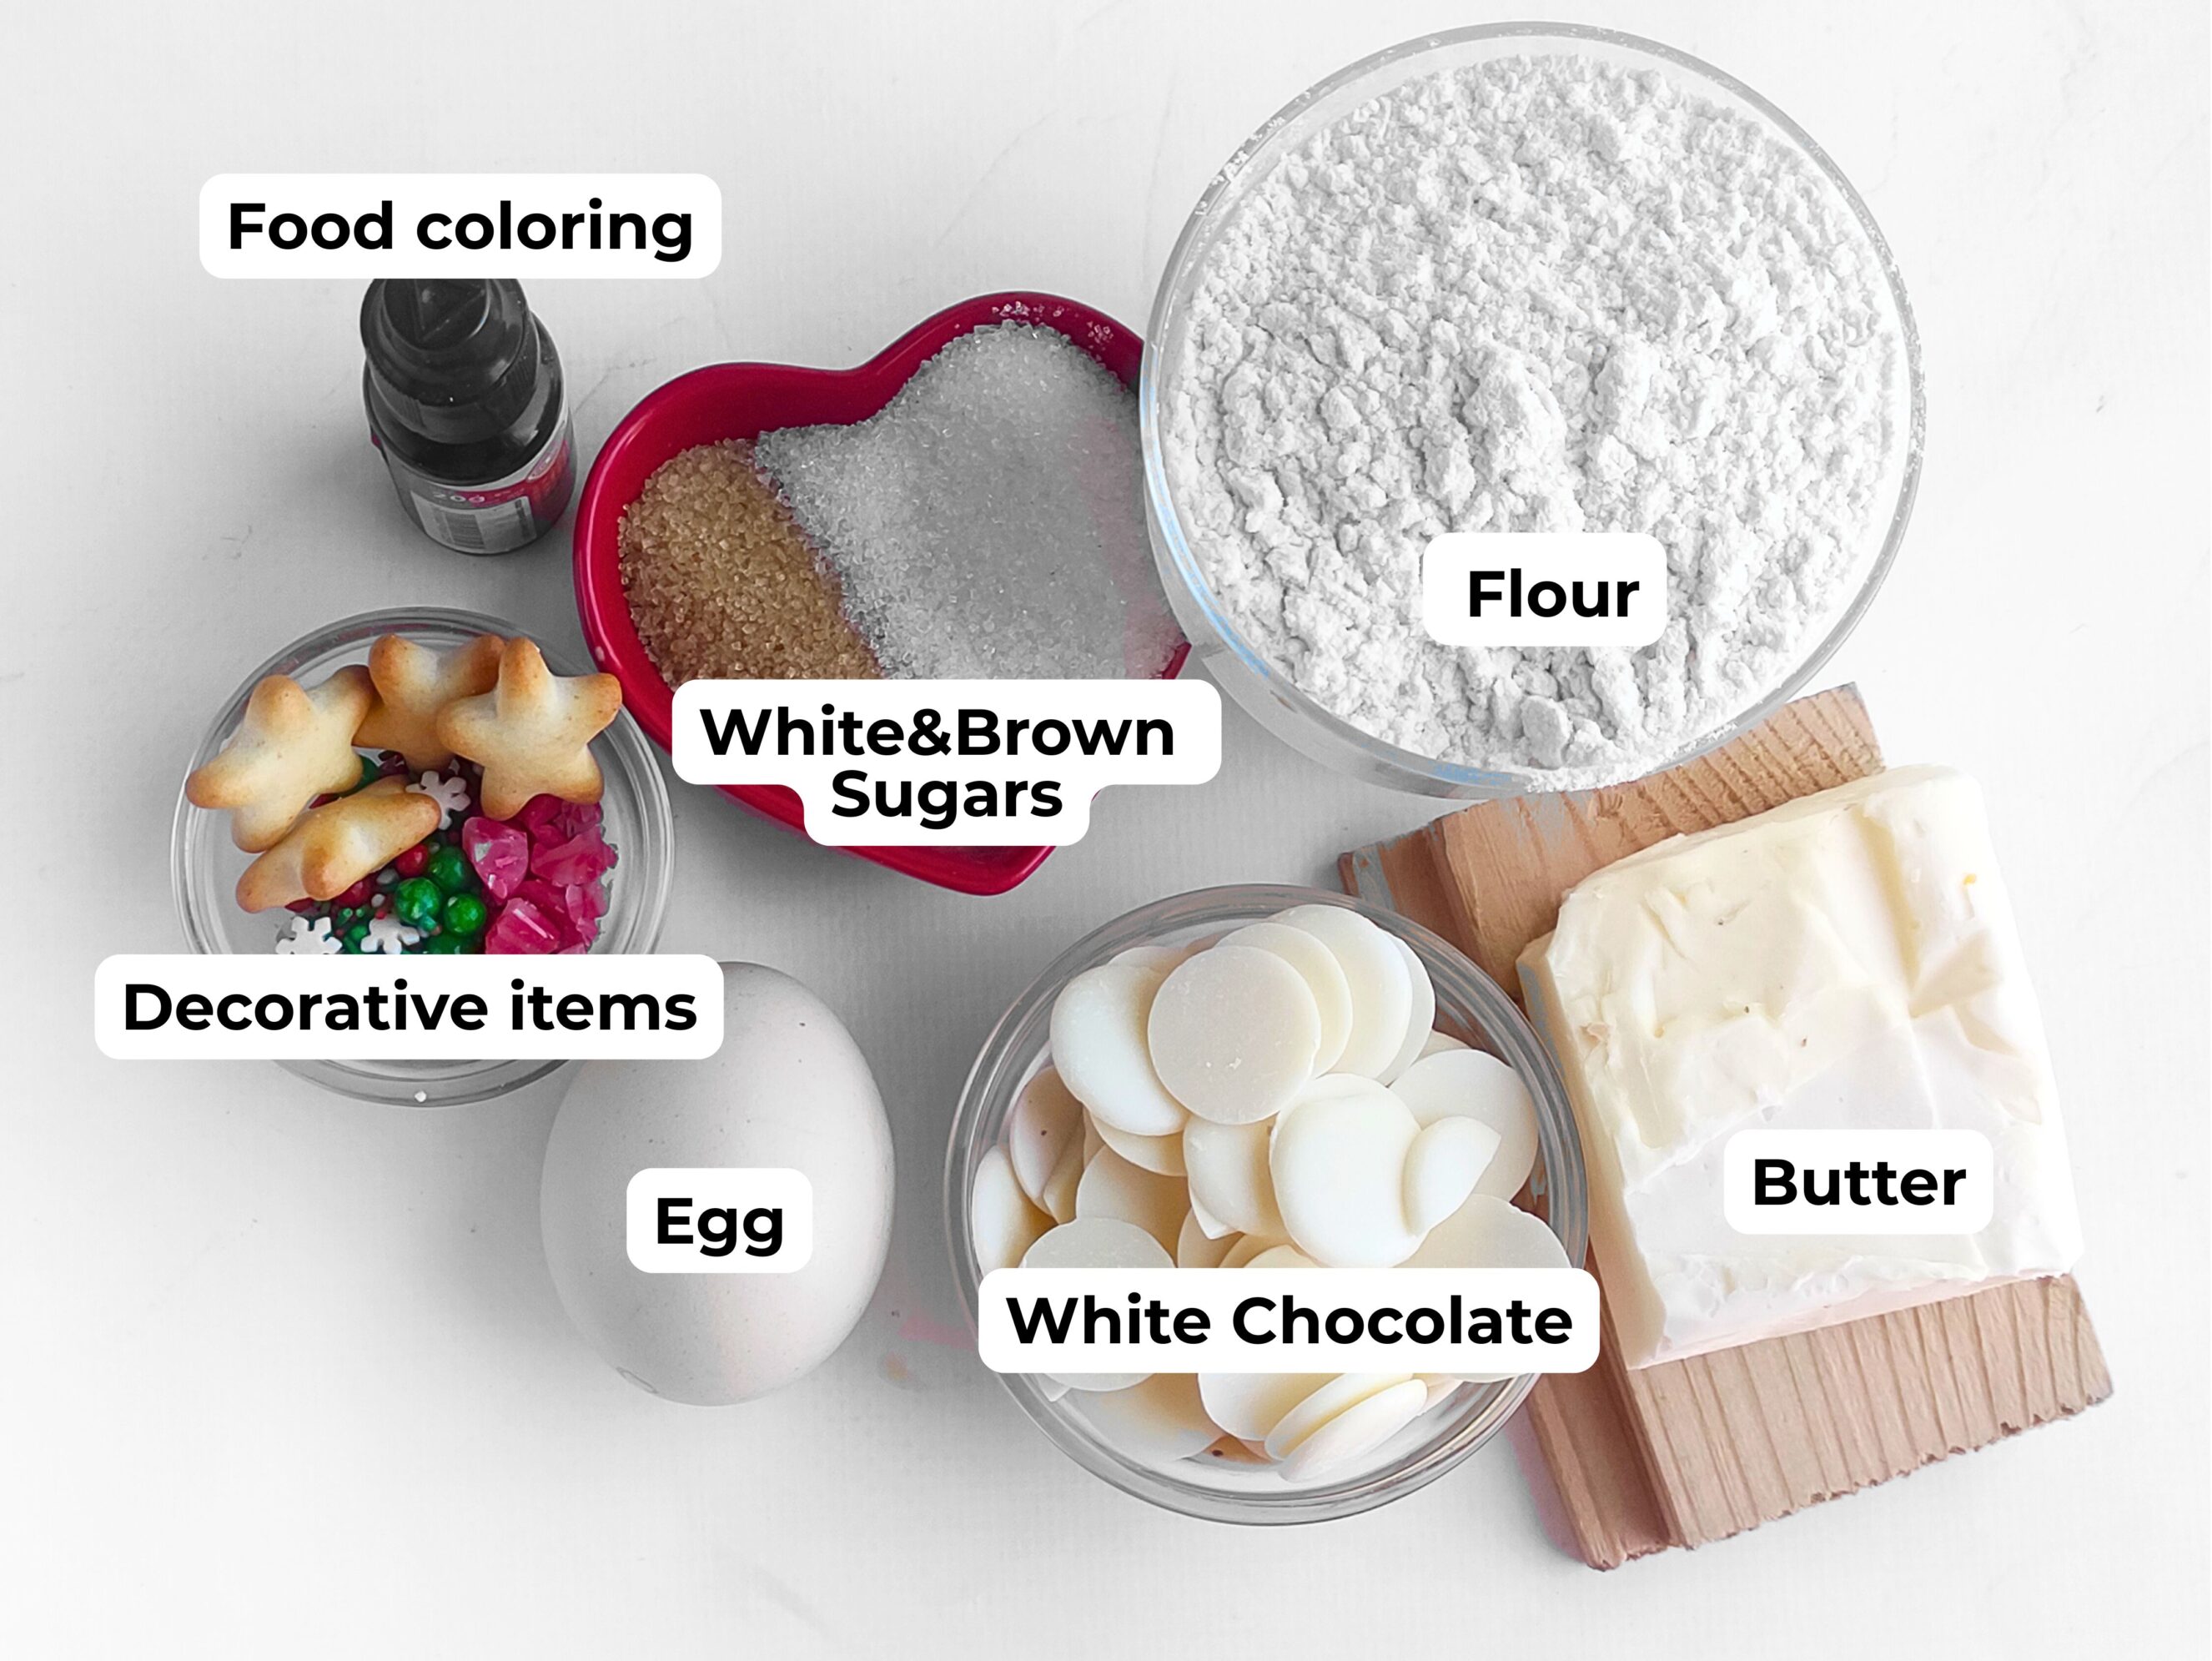
Ingredients for Red Velvet Cookies
For the dough
- 1 egg
- 5 tbsp butter
- 1 ½ tbsp brown sugar
- 1 ½ tbsp white sugar
- 1¼ cups self-rising flour, plus up to 1 extra tablespoon if needed (Add the extra only if your dough feels too soft). Alternatively, use all-purpose flour + ½ tsp baking powder, if you don’t have self-rising flour
- ⅓ cup white chocolate, chopped or chips
- 3-4 drops red food coloring
For decoration
- ¼ cup white chocolate (for drizzling)
- 1-2 tsp red and green sprinkles
- 1-2 tsp crushed peppermint candies or candy cane pieces
- Mini star cookies or graham stars for the tops
Step-by-Step Instructions
1. Melt the butter and chocolate
In a heat-safe bowl, melt the butter in the microwave or using a double boiler. Once melted, add the white chocolate and stir until smooth and glossy.
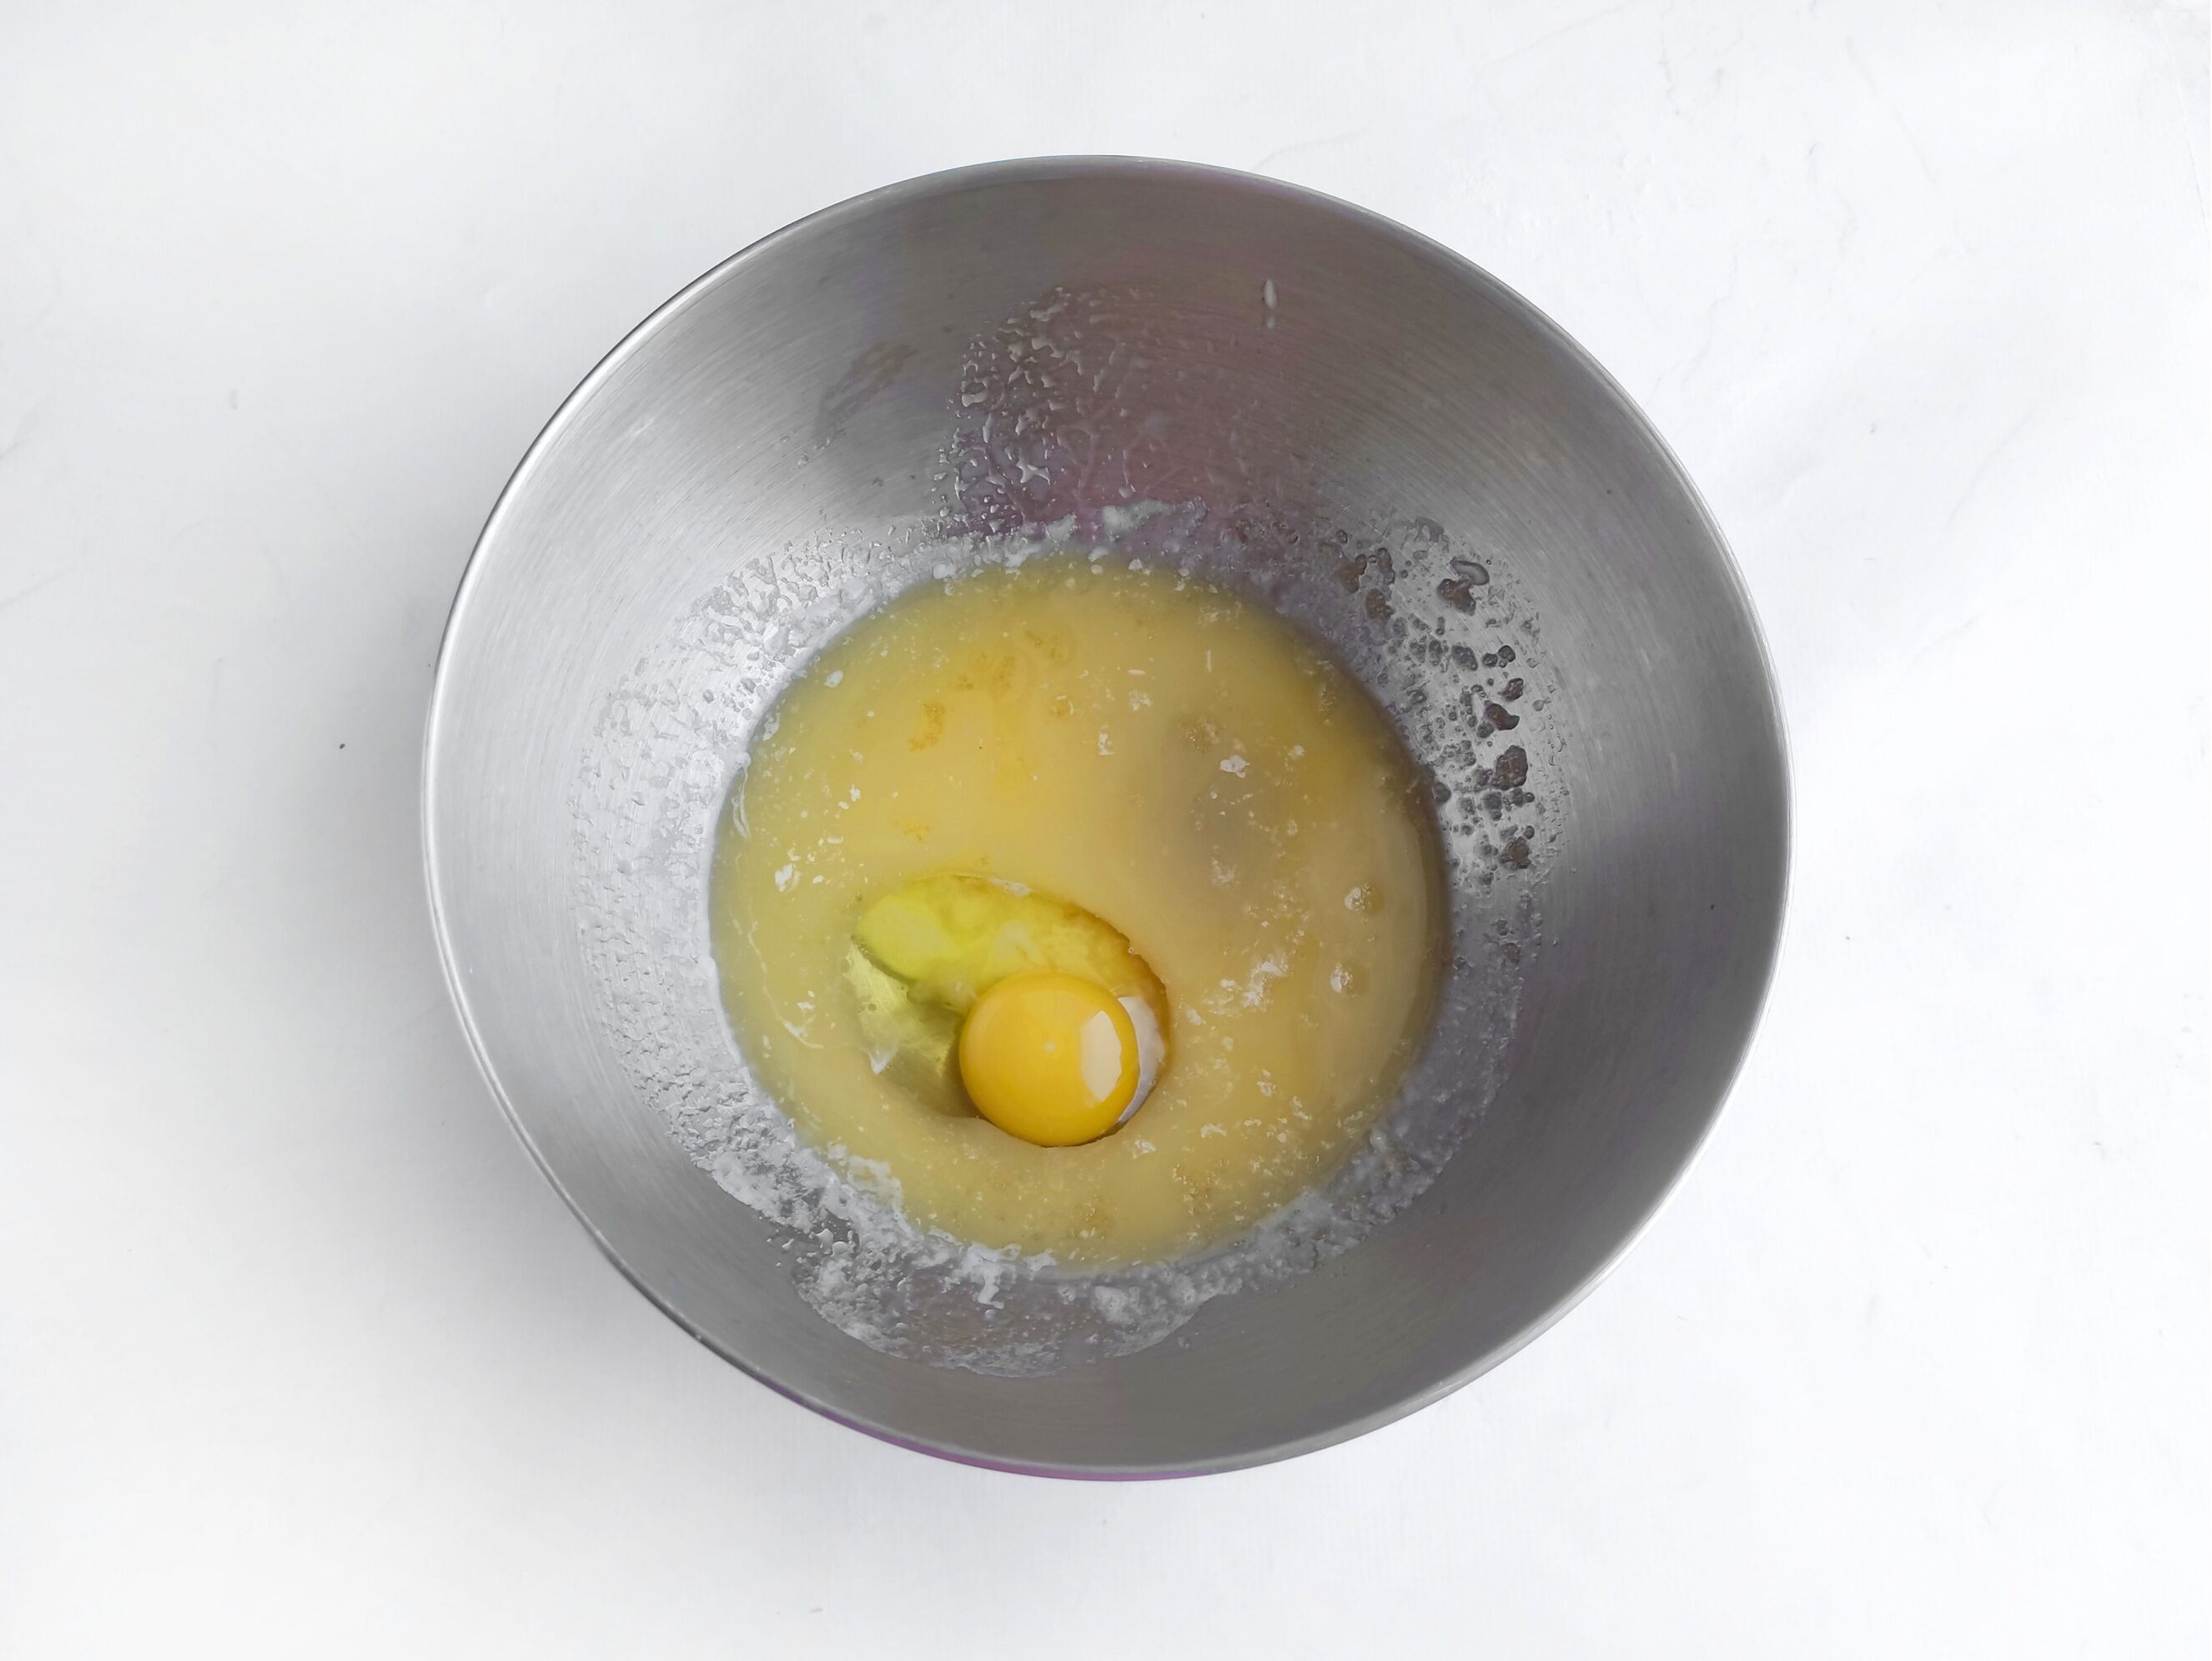
2. Mix wet ingredients
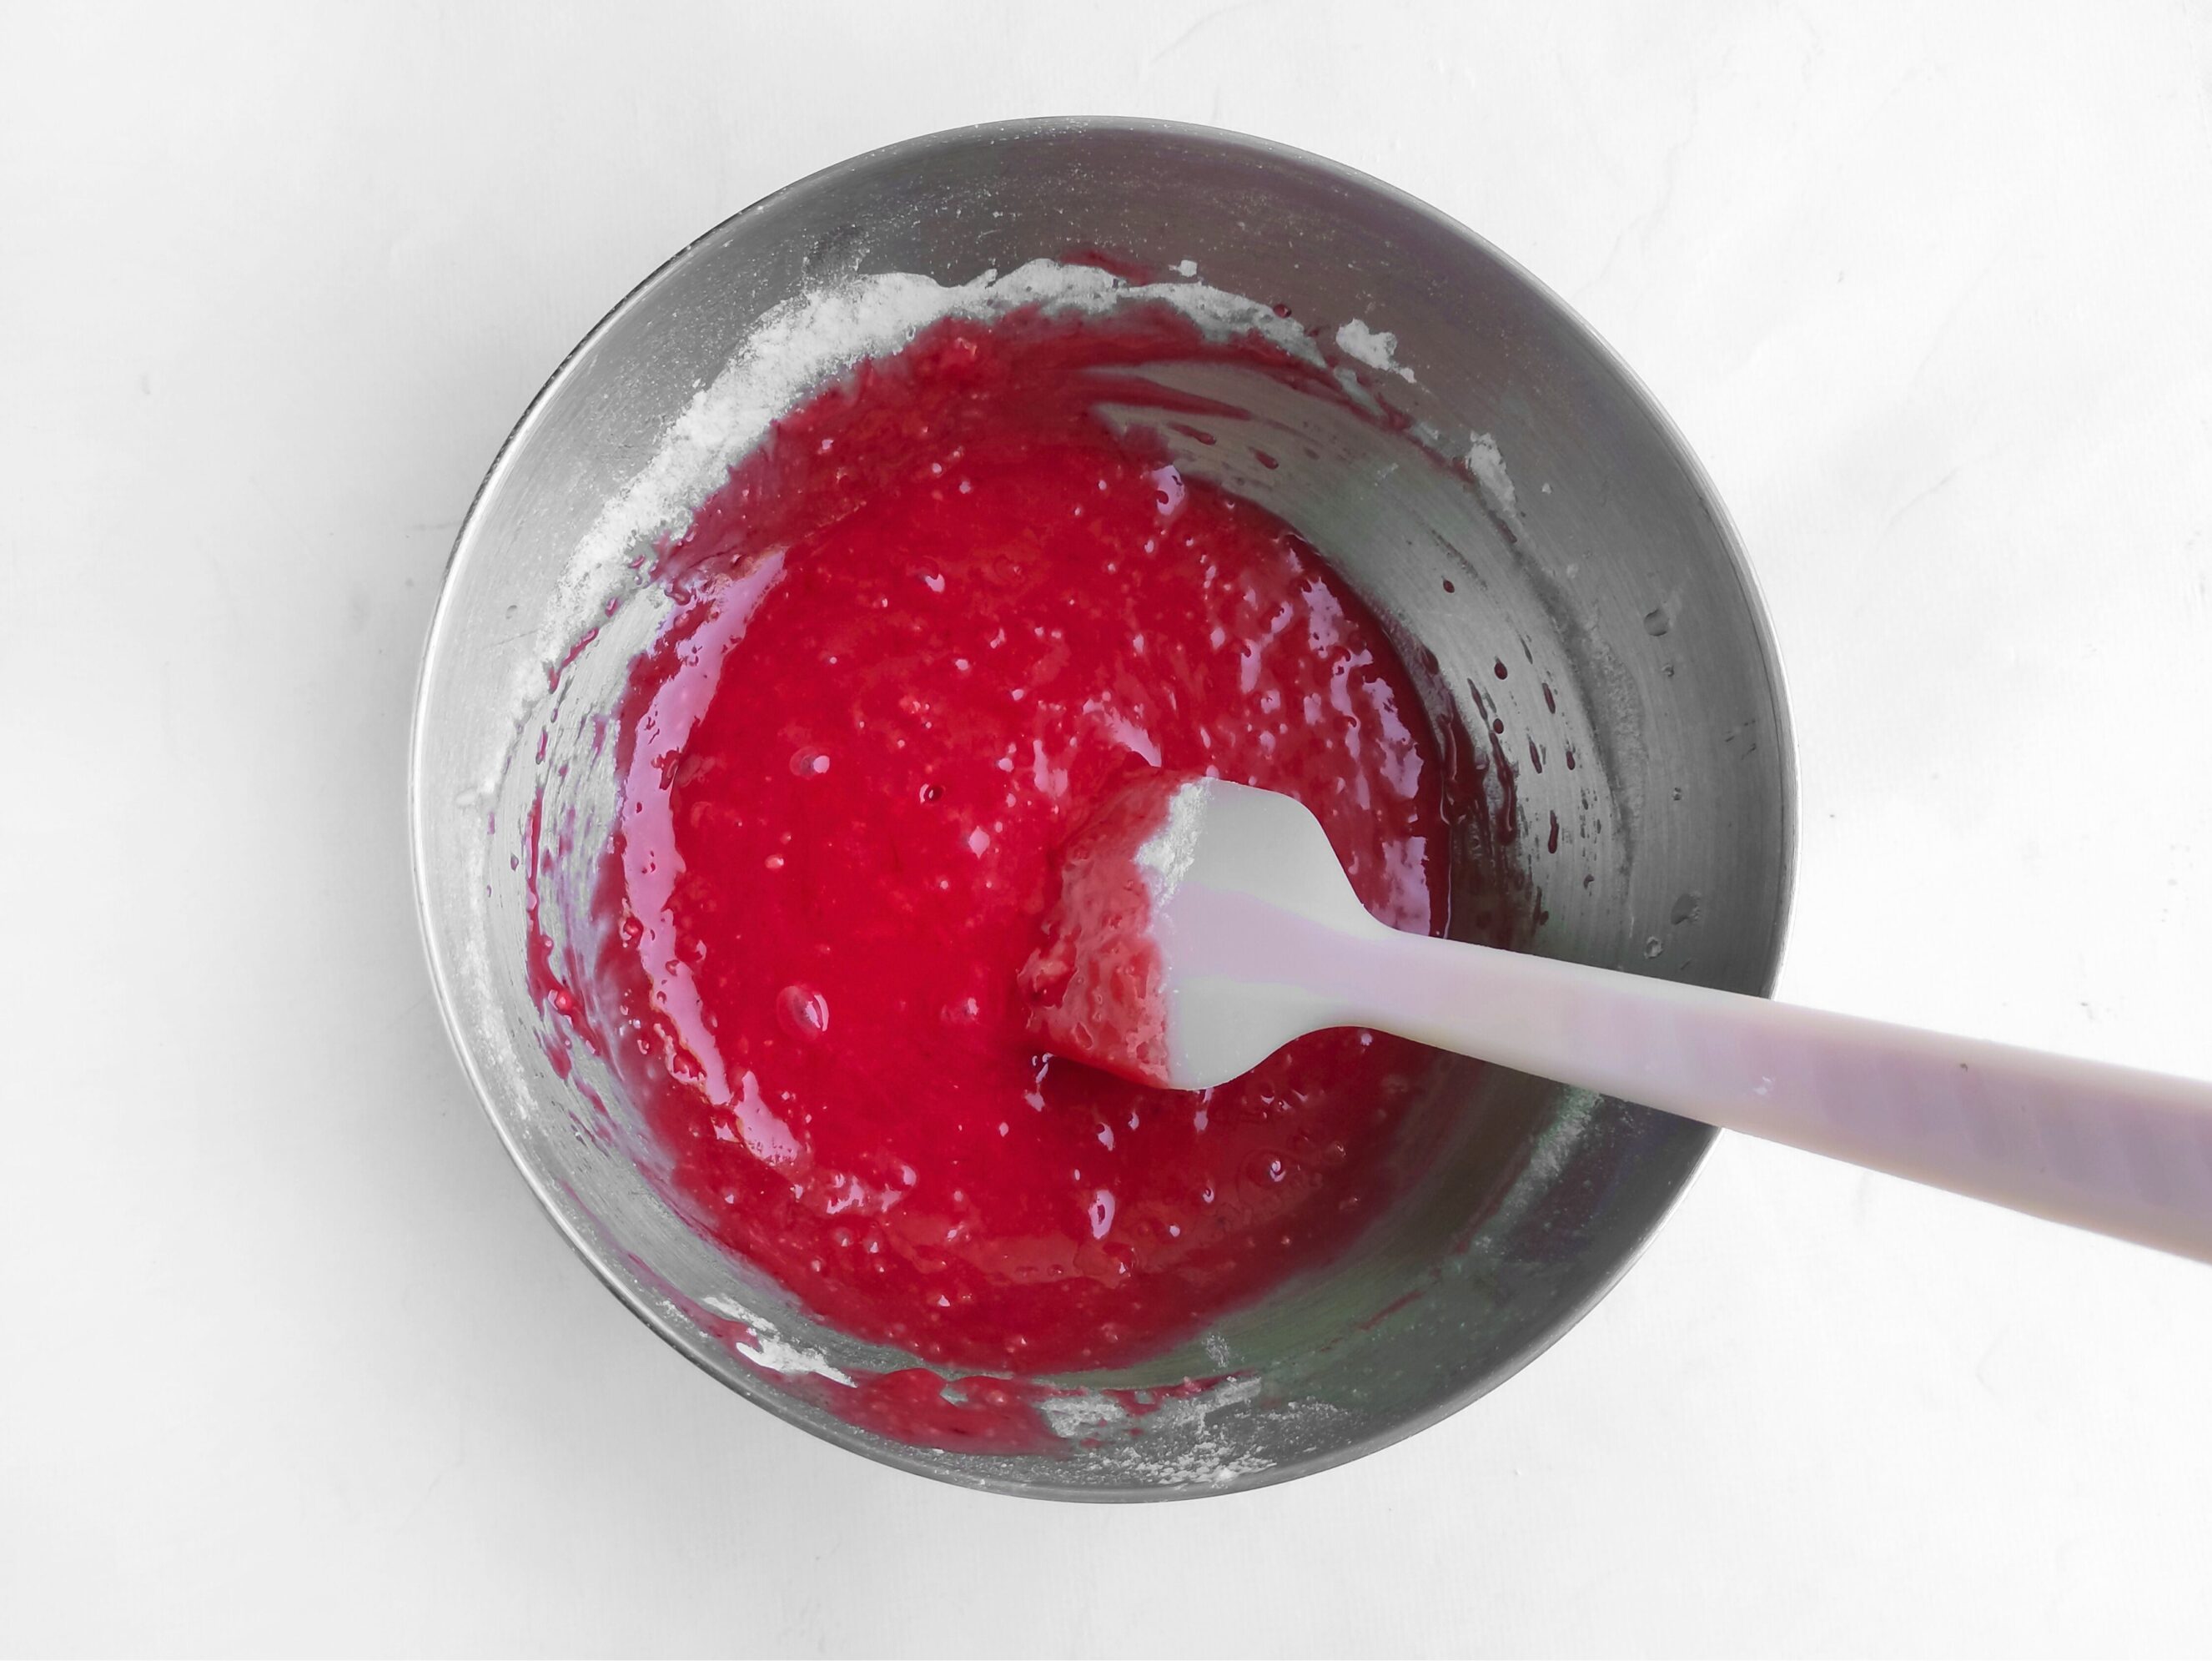
Add both sugars to the chocolate mixture and stir well. Then whisk in the egg until everything is evenly combined. The mixture should look smooth and slightly thick.
3. Add color and flour
Stir in a few drops of red food coloring. Start with 3 drops and add more if needed for a deep Christmas red. Gradually add the flour, mixing until it forms a soft dough that doesn’t stick to your hands.
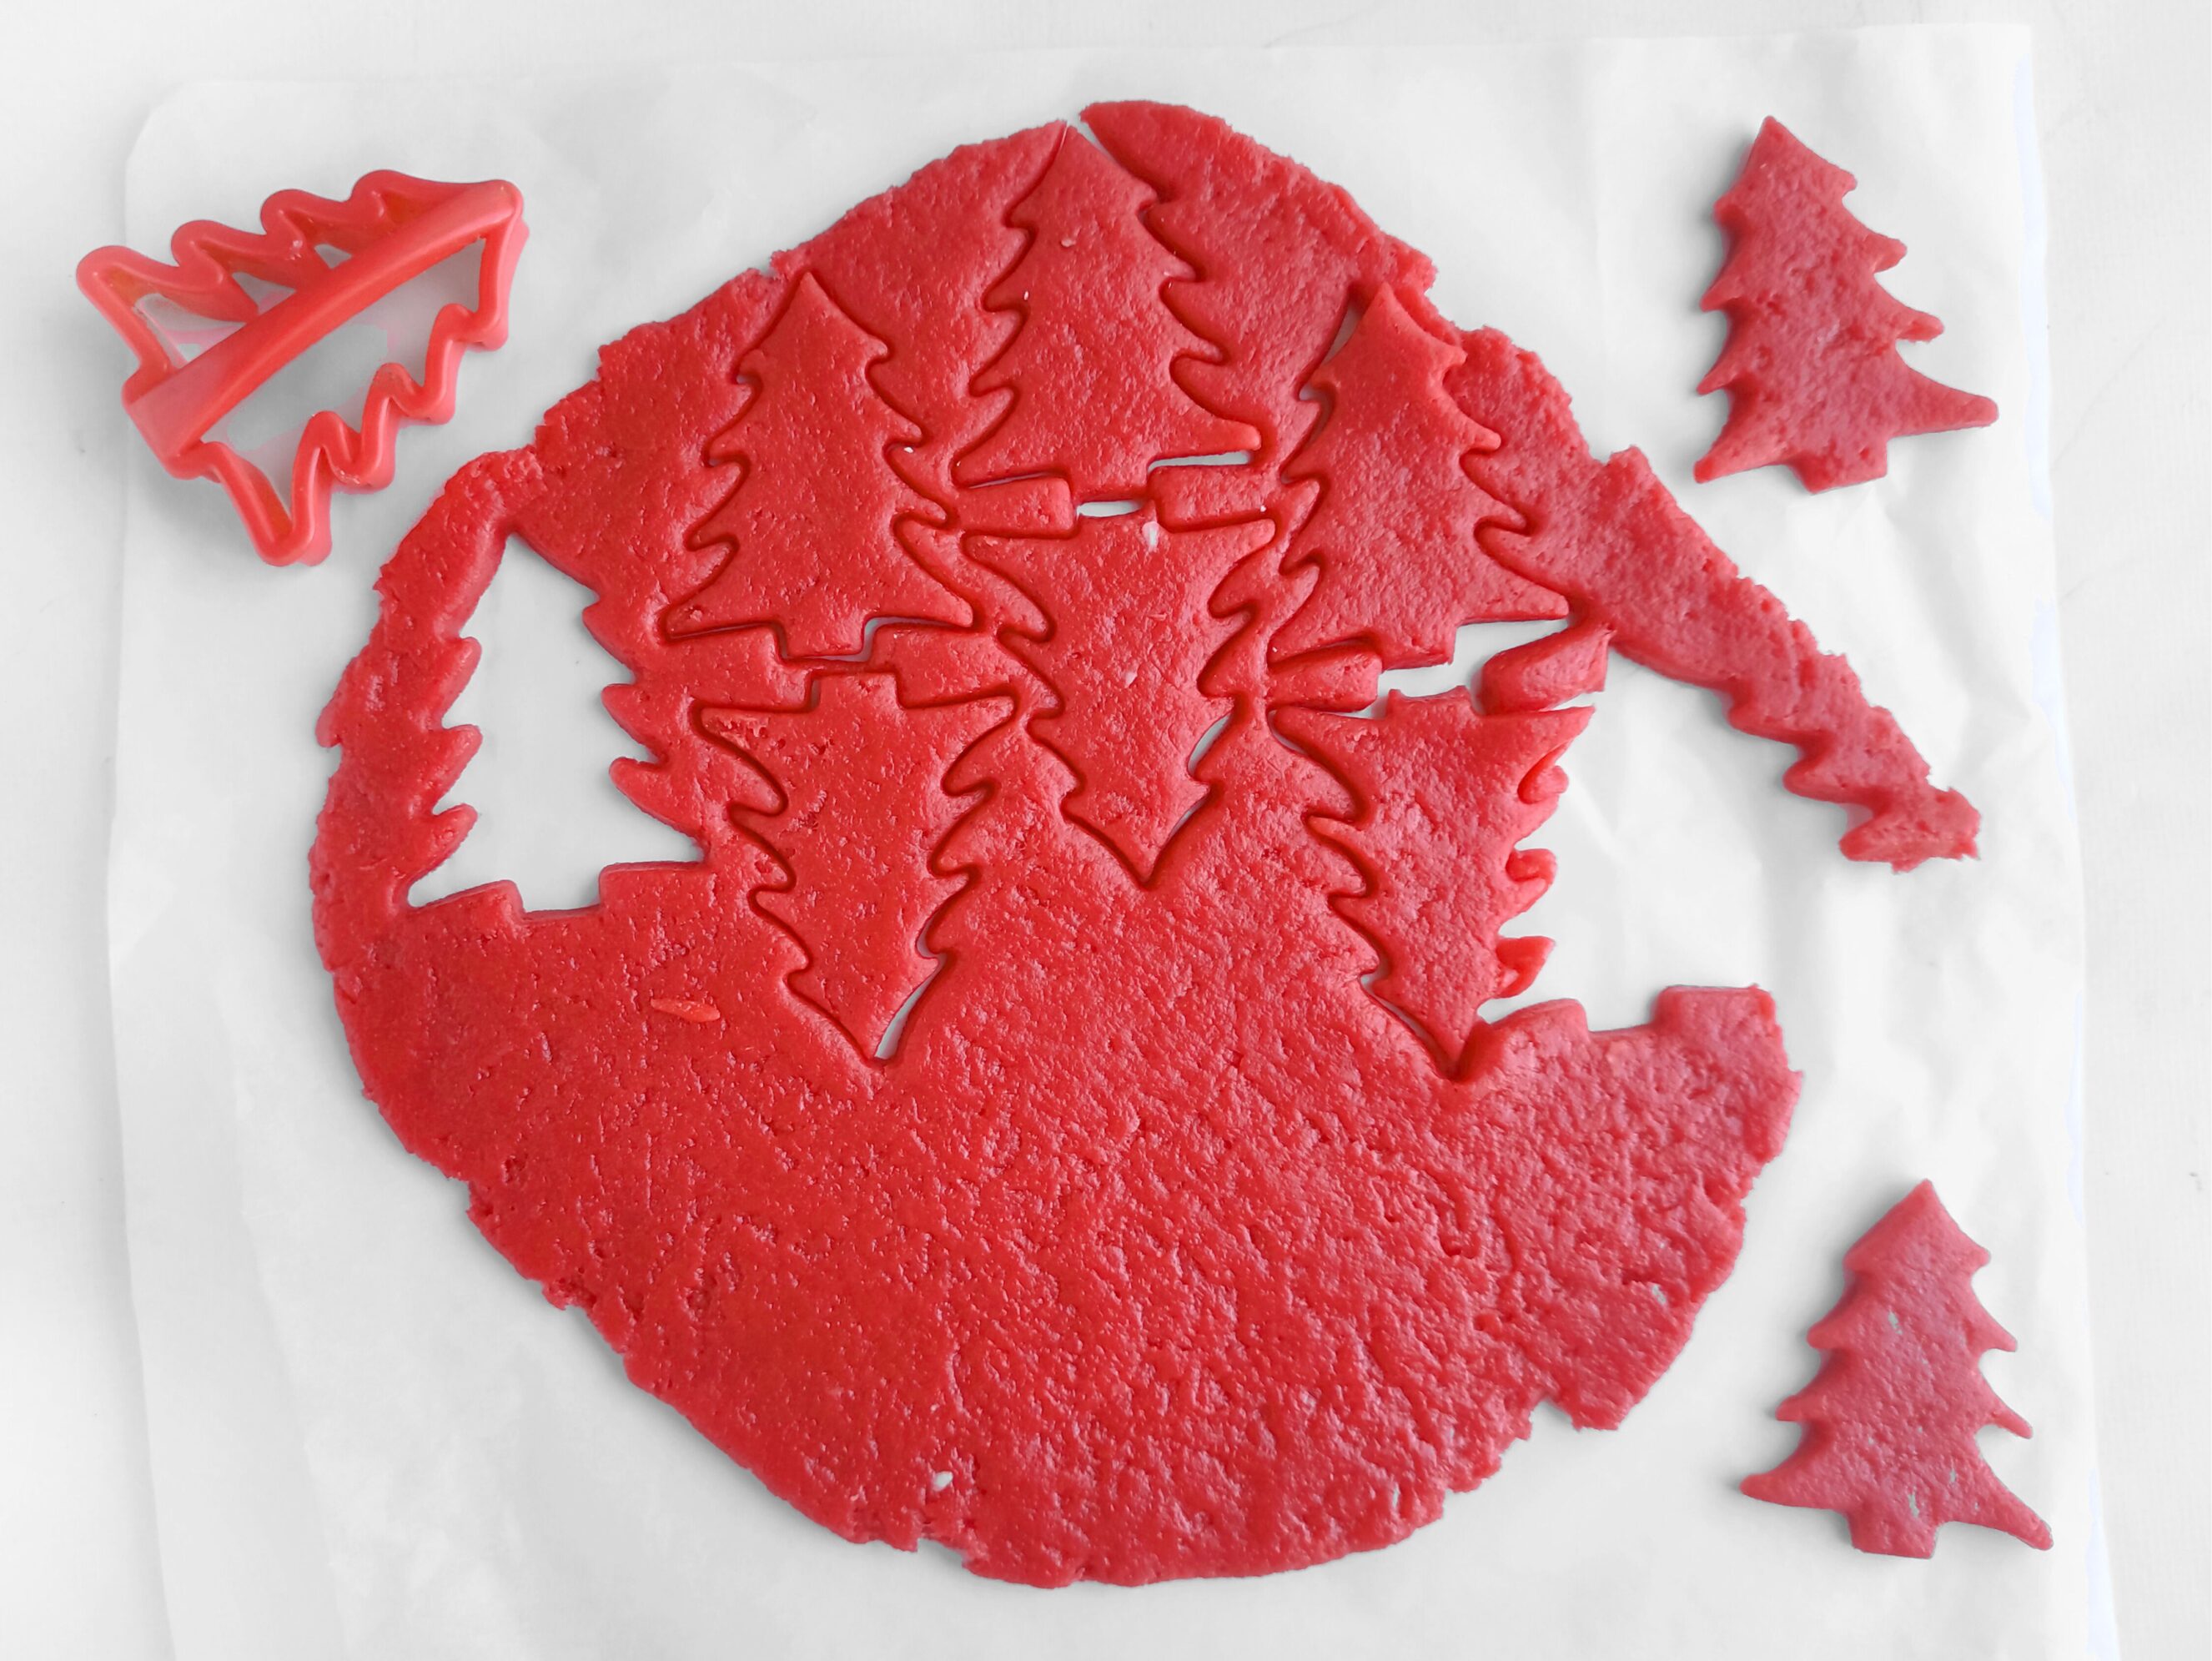
4. Roll and cut
Place the dough between two sheets of parchment paper and roll it out evenly to about 1/5 inch thickness.
Use a Christmas tree-shaped cookie cutter to cut out trees. If you don’t have one, a star or round cutter works too.
5. Bake
Carefully transfer the cut-out cookies (along with the parchment paper) to a baking tray.
Bake in a preheated oven at 180°C / 356°F for 8–10 minutes, or until the edges are just set and lightly golden.
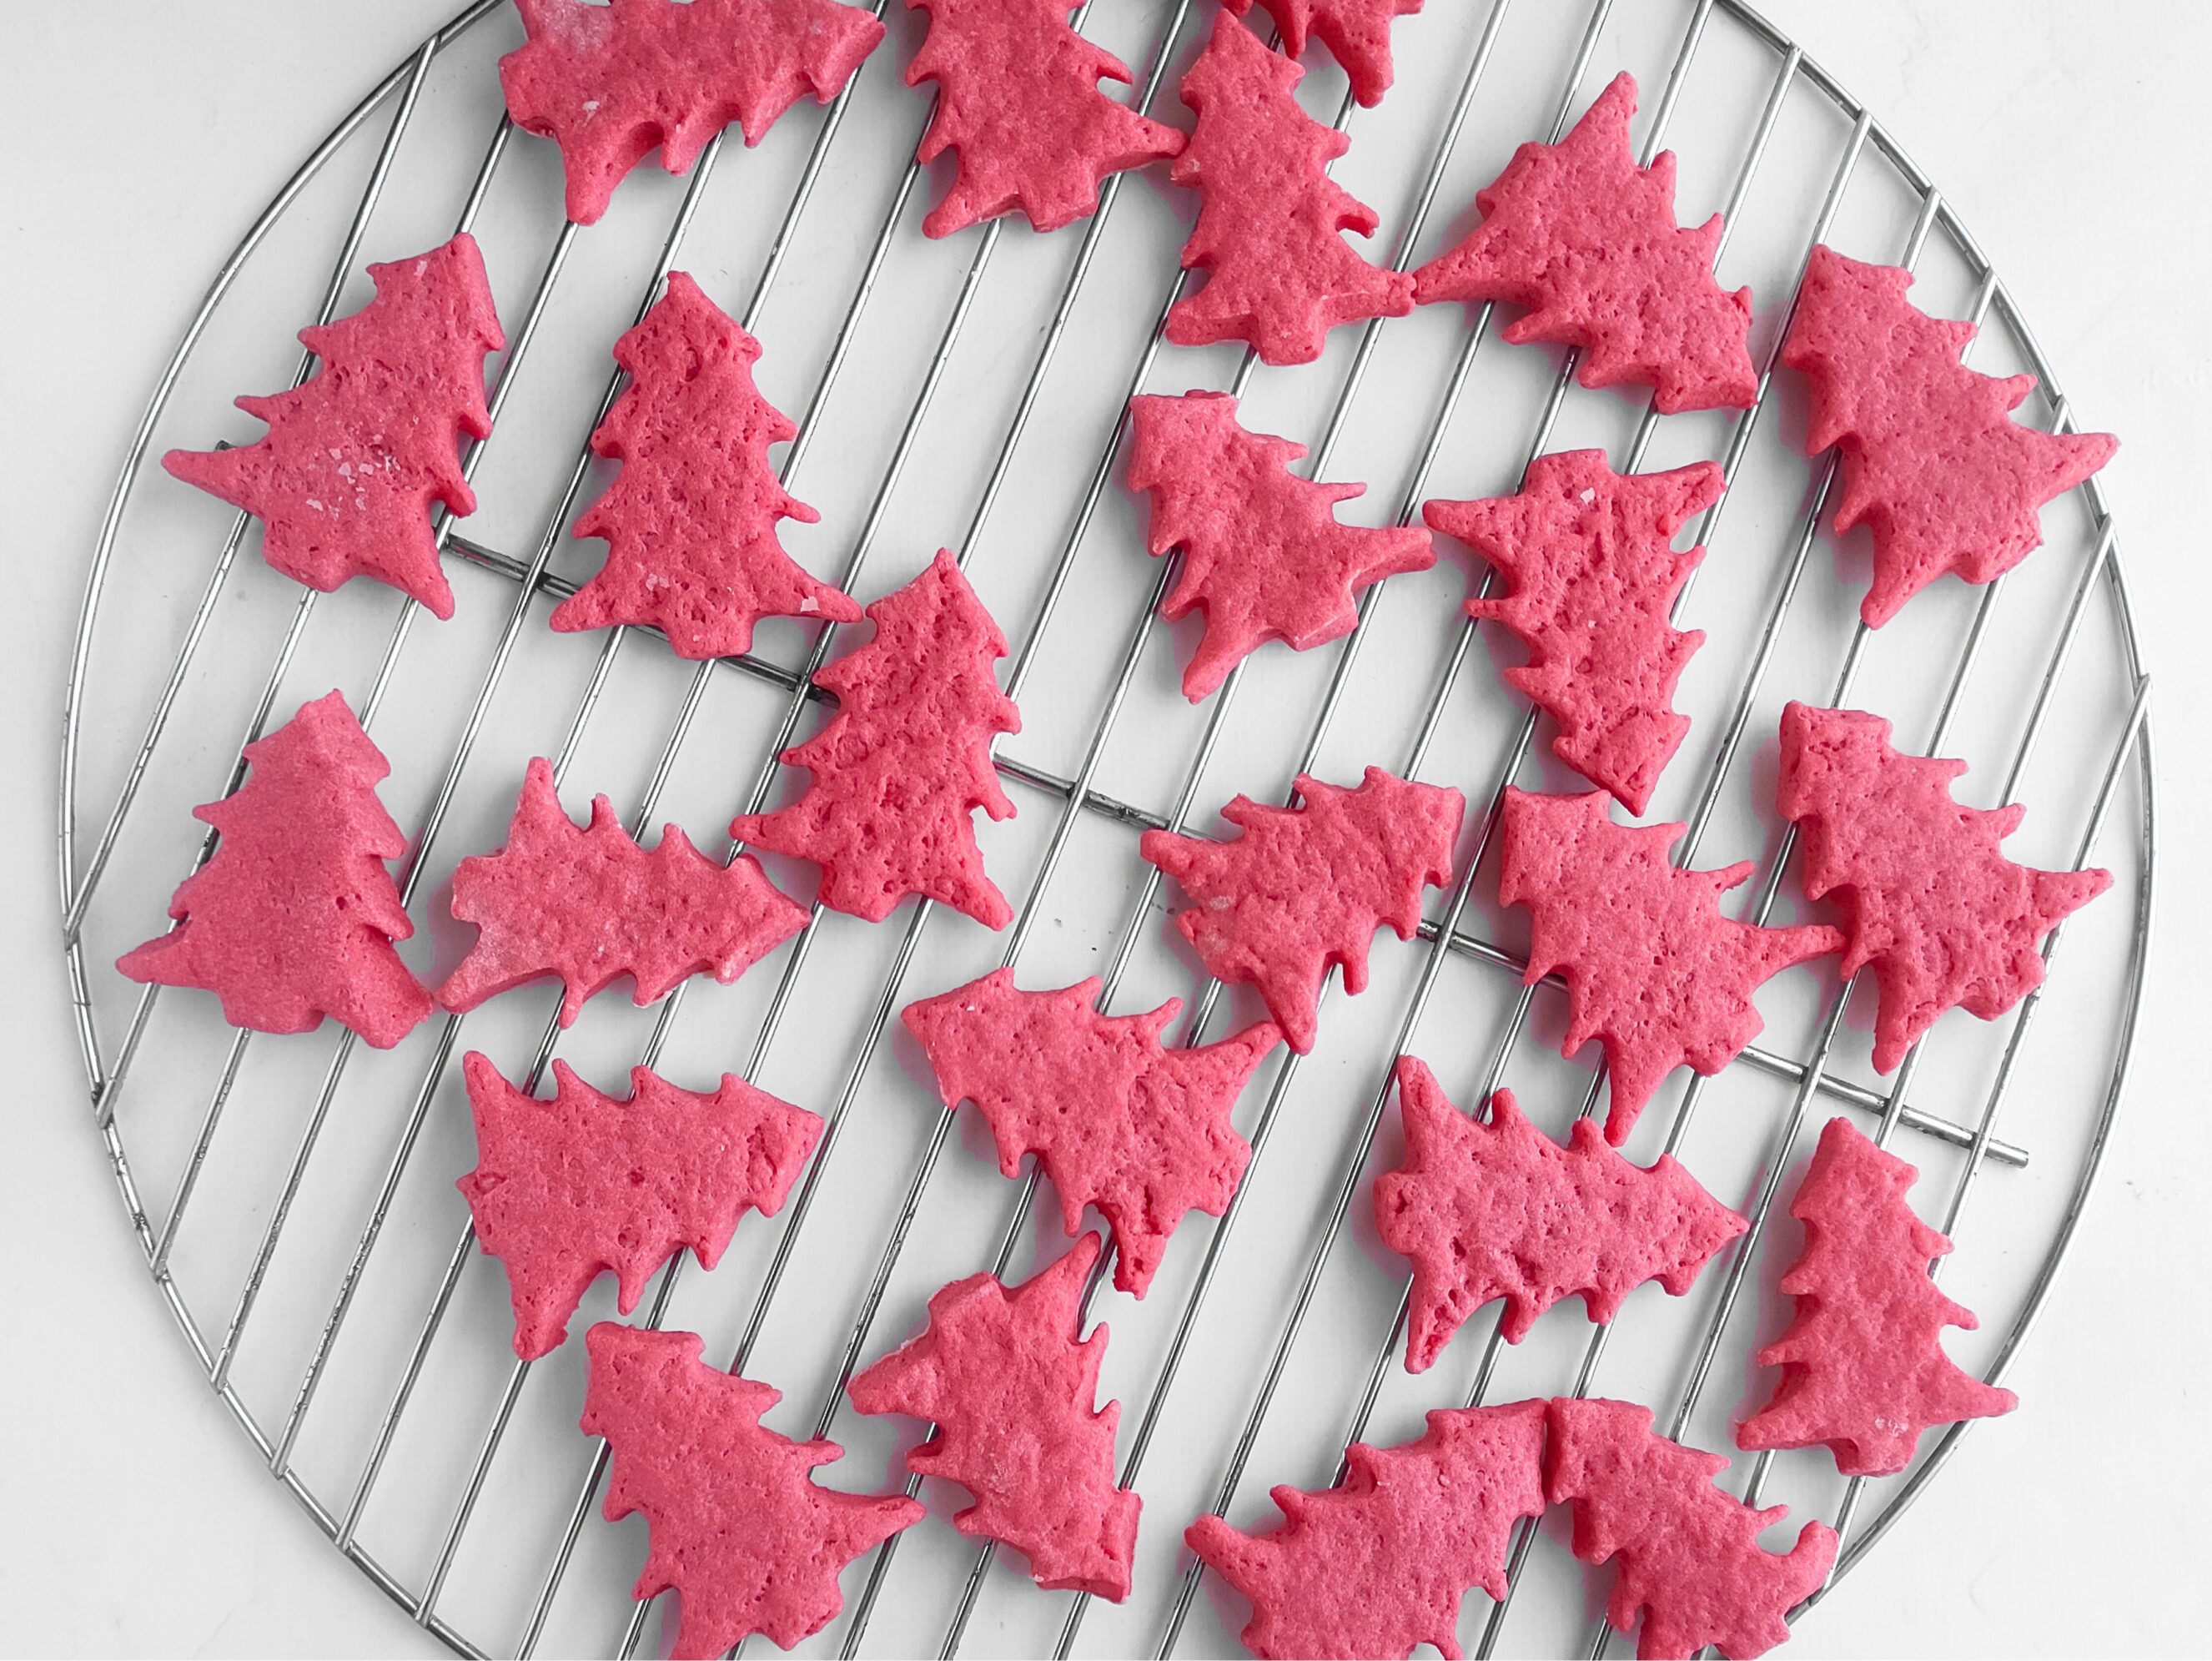
6. Cool completely
Let the cookies rest on the tray for a minute, then move them to a wire rack to cool fully before decorating. Warm cookies will melt your drizzle, so cooling is important.
7. Prepare the decorations
Peppermint shards: Place a few peppermint candies or candy canes in a ziplock bag and gently crush them with a rolling pin into small colorful pieces.
Star toppers: If you have mini graham cracker stars, keep them ready to place on top of your trees. You can also use any mini star cookies or cut a few from leftover dough.
Candy trunks: Keep round peppermint candies handy for when you arrange the cookies into one large tree shape later, to use as trunks.
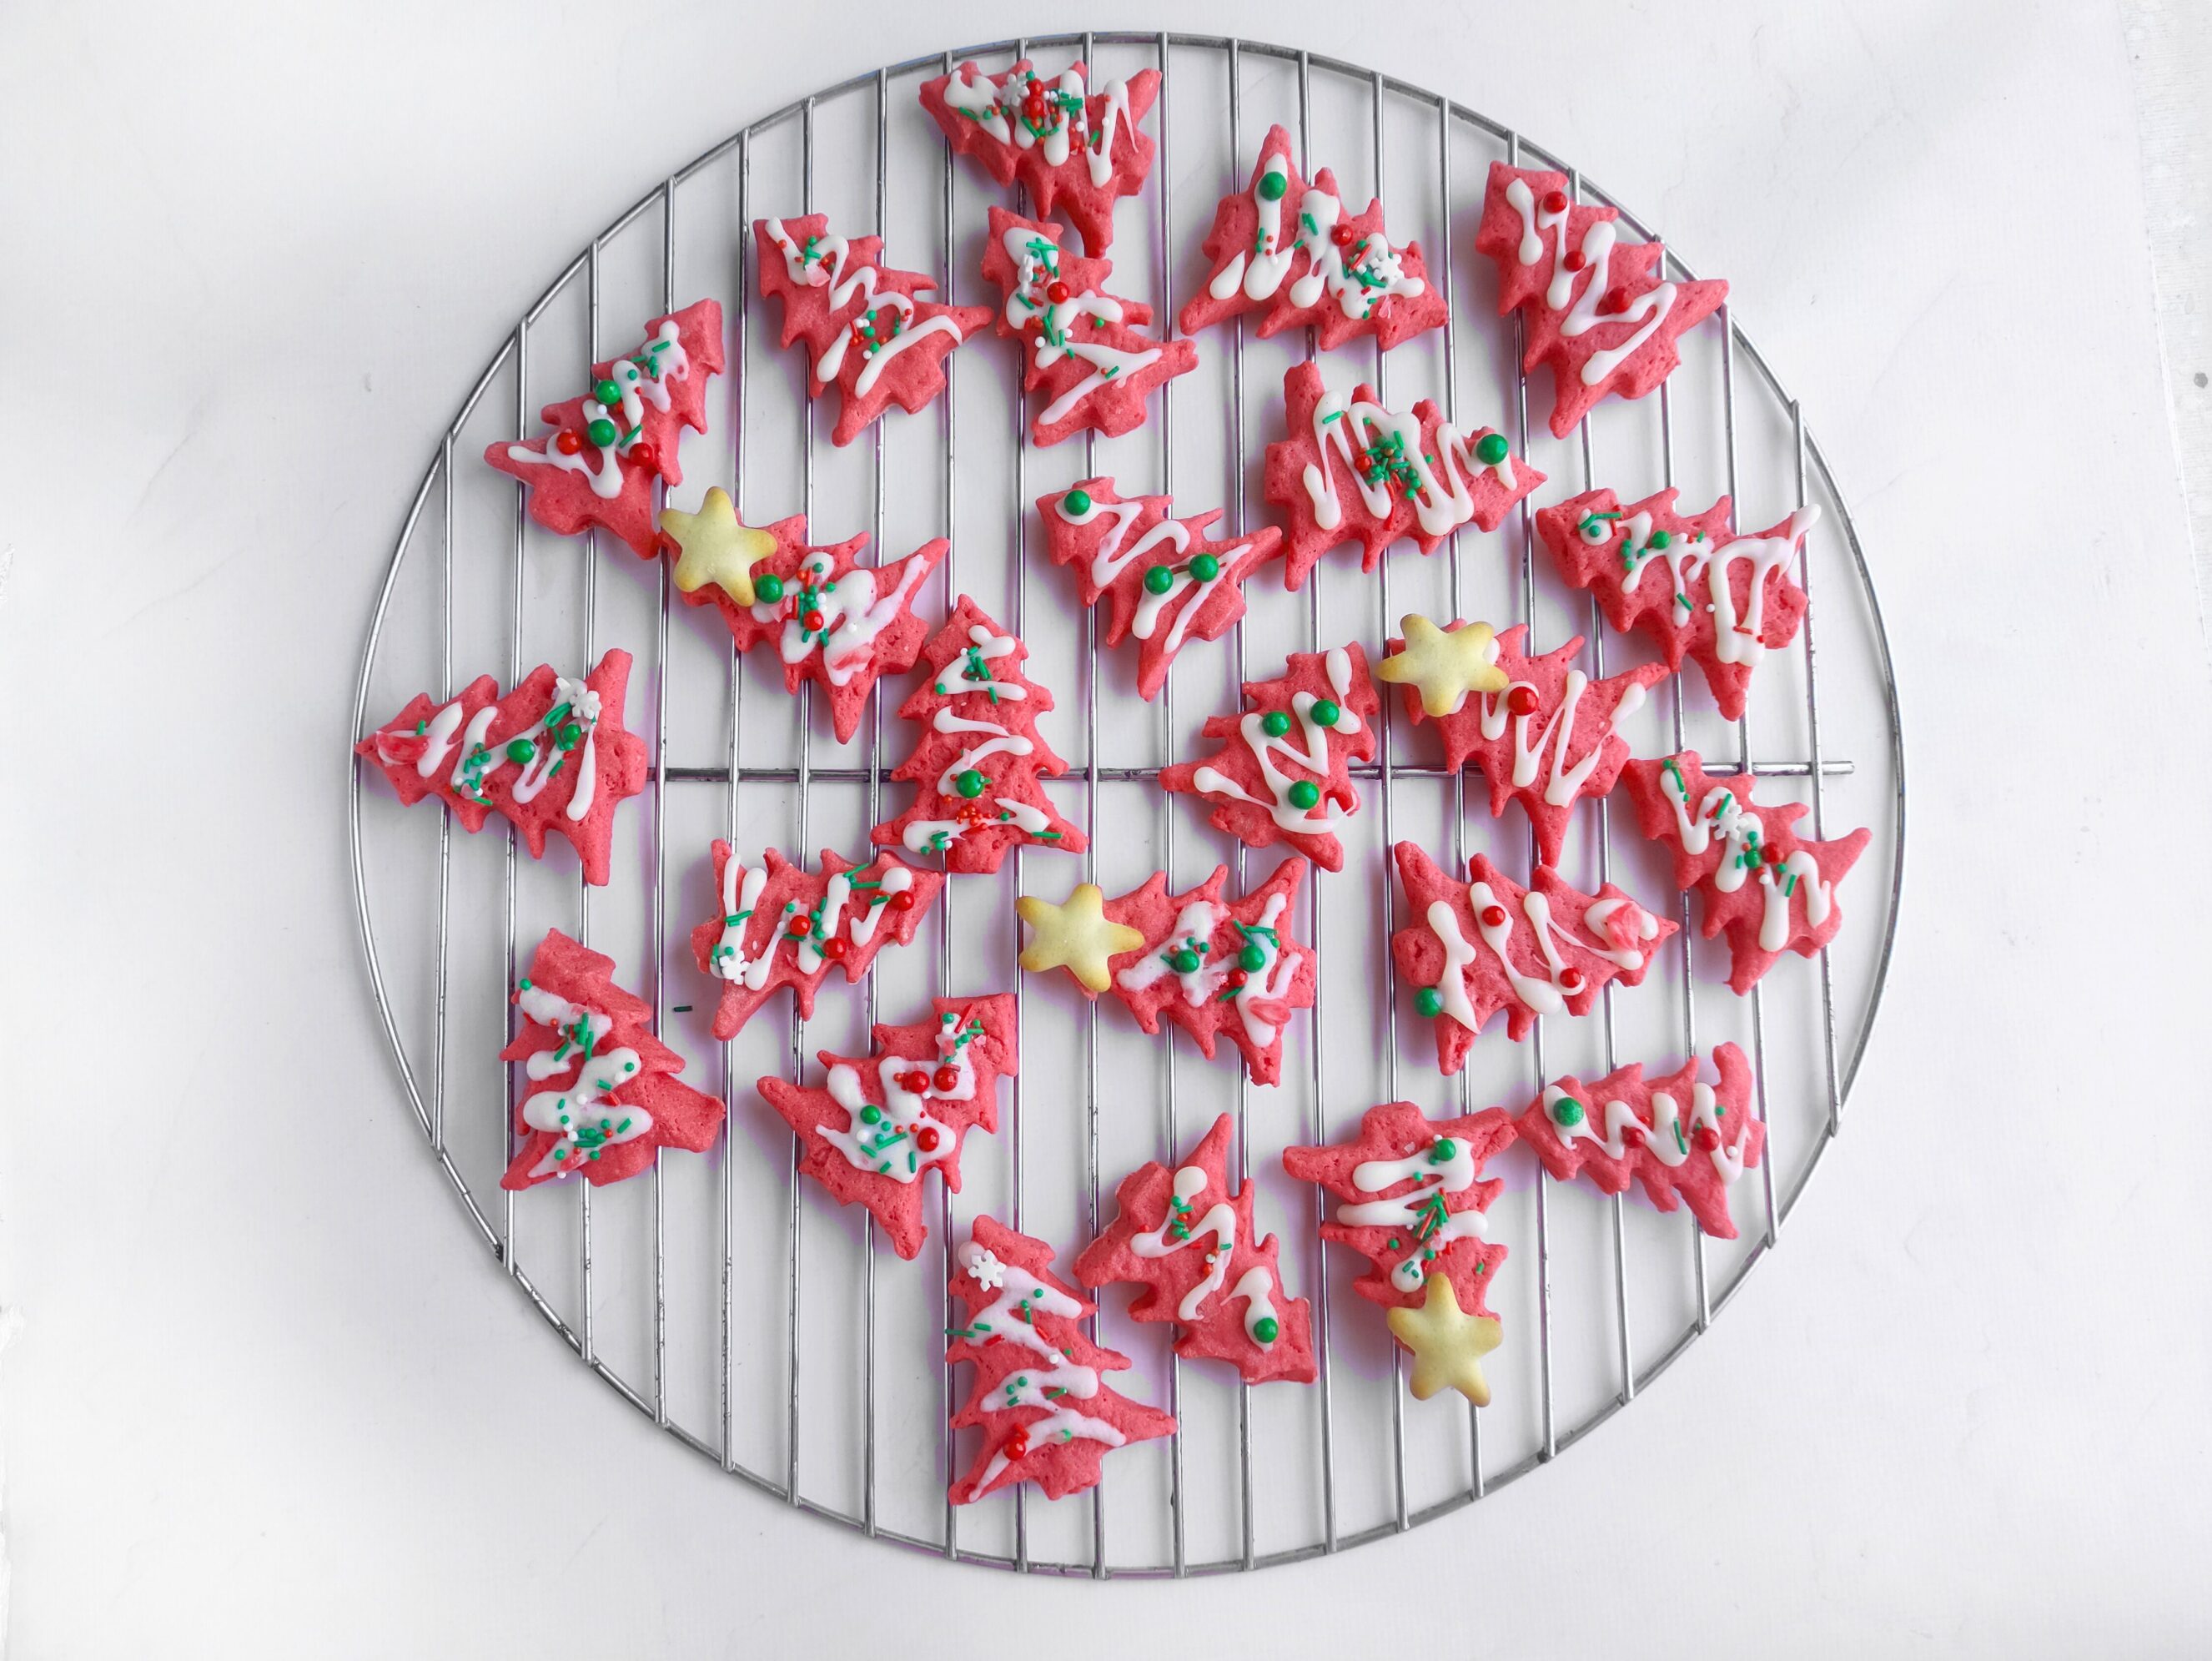
8. Decorate the cookies
Melt the white chocolate in short 10–15 second microwave bursts(pulse mode), stirring until smooth and pourable (it should look like condensed milk).
Transfer to a piping bag or ziplock bag with a tiny corner snipped off. Pipe wavy lines over each cookie to look like snow on tree branches.
While the chocolate is still soft, sprinkle red and green sprinkles and peppermint candy shards on top.
Gently press a mini graham cracker star on the tip of cookies while the drizzle is still tacky so it sticks well.
9. Assemble (optional but fun!)
To make a centerpiece, place all the cookies on a board in the shape of a large Christmas tree.
Add a few peppermint candies at the bottom to form the trunk, and a star cookie at the top if you’d like.
Serve and enjoy.
TIP: Let the decorations sit for about 10–15 minutes before serving or packaging. These cookies make beautiful gifts or additions to your holiday dessert table.
Storage Tips
Keep your cookies in an airtight container at room temperature for up to 5 days, or refrigerate for up to 2 weeks.
You can also freeze the undecorated cookies for up to 3 months and decorate them fresh before serving for the best flavor and appearance.
Frequently Asked Questions
Can I make these cookies ahead of time?
Yes! You can prepare the dough up to two days ahead and keep it refrigerated in an airtight container. When ready to bake, let it sit at room temperature for about 10 minutes so it’s easy to roll out.
Can I freeze the cookies?
Absolutely. These cookies freeze beautifully. Store the undecorated cookies in a freezer-safe container for up to 3 months. When you’re ready to serve them, thaw at room temperature, then drizzle with melted white chocolate and decorate.
Can I use all-purpose flour instead of self-rising flour?
Yes. Just add ½ teaspoon baking powder for every cup of all-purpose flour you use. This helps the cookies stay light and slightly puffy.
What kind of food coloring should I use?
Gel food coloring works best because it gives a vibrant red without changing the dough’s texture. If you’re using liquid food color, add it gradually and reduce the amount of egg slightly if your dough feels too soft.
Can I use dark chocolate instead of white chocolate?
You can, but keep in mind that dark chocolate will deepen the red color and make your cookies look more burgundy than bright red. The flavor will be slightly richer and less sweet. It will still be delicious, just different.
Do I have to use peppermint candy?
Not at all! The peppermint adds a festive crunch and a touch of cool flavor, but you can skip it or replace it with crushed nuts, mini M&Ms, or even edible glitter for a fun twist.
My cookies spread while baking – what did I do wrong?
If your dough feels too soft, pop it into the fridge for 10–15 minutes before rolling. Also, make sure your butter isn’t too hot when mixing. Warm butter can cause spreading.
Can I make these cookies gluten-free?
Yes, simply use a 1:1 gluten-free all-purpose flour blend. Check that your chocolate and decorations are gluten-free as well.
How should I store decorated cookies?
Once decorated and set, keep the cookies in a single layer or with parchment paper between layers in an airtight container. They’ll stay fresh at room temperature for about 5 days.
Tips for Perfect Cookies Every Time
Use room-temperature ingredients
Cold butter or eggs can make the dough stiff and uneven. Let them sit out for about 15–20 minutes before mixing. It helps everything blend smoothly.
Don’t overmix the dough
Once you add the flour, mix only until the dough comes together. Overmixing can make cookies tough instead of tender.
Keep your dough thickness even
Rolling the dough between two sheets of parchment paper helps you get uniform cookies that bake evenly. Aim for about 1/5 inch thick.
Watch your oven time closely
Cookies bake quickly; a minute too long can dry them out. Take them out when the edges just start turning golden; they’ll firm up as they cool.
Cool completely before decorating
If the cookies are warm, the melted white chocolate will slide off. Let them cool completely on a wire rack for the prettiest drizzle.
Decorate one cookie at a time
Sprinkles and peppermint shards stick best when added right after drizzling the white chocolate. Work in small batches for neat, festive results.
Play with presentation
Arrange your cookies into a big Christmas tree or wreath for a beautiful edible centerpiece. It’s a fun activity for kids and looks stunning on a dessert table.
Red Velvet White Chocolate Christmas Cookies
Ingredients
For the dough
- 1 egg
- 5 tbsp butter
- 1 ½ tbsp brown sugar
- 1 ½ tbsp white sugar
- 1¼ cups self-rising flour, plus up to 1 extra tablespoon if needed (Add the extra only if your dough feels too soft). Alternatively, use all-purpose flour + ½ tsp baking powder, if you don't have self-rising flour
- ⅓ cup white chocolate, chopped or chips
- 3–4 drops red food coloring
For decoration
- ¼ cup white chocolate (for drizzling)
- 1–2 tsp red and green sprinkles
- 1–2 tsp crushed peppermint candy shards (crush peppermint candies or candy canes in a ziplock bag with a rolling pin)
- Mini graham cracker stars (for the top of each tree)
- Peppermint candies (for the trunk when assembling cookies into one big Christmas tree)
Instructions
1. Melt the butter and chocolate
In a heat-safe bowl, melt the butter in the microwave or using a double boiler. Once melted, add the white chocolate and stir until smooth and glossy.
2. Mix wet ingredients
Add both sugars to the chocolate mixture and stir well. Then whisk in the egg until everything is evenly combined. The mixture should look smooth and slightly thick.
3. Add color and flour
Stir in a few drops of red food coloring. Start with 3 drops and add more if needed for a deep Christmas red. Gradually add the flour, mixing until it forms a soft dough that doesn’t stick to your hands.
4. Roll and cut
Place the dough between two sheets of parchment paper and roll it out evenly to about 1/5 inch thickness.
Use a Christmas tree-shaped cookie cutter to cut out trees. If you don’t have one, a star or round cutter will also work.
5. Bake
Carefully transfer the cut-out cookies (along with the parchment paper) to a baking tray.
Bake in a preheated oven at 180°C / 356°F for 8–10 minutes, or until the edges are just set and lightly golden.
6. Cool completely
Let the cookies rest on the tray for a minute, then move them to a wire rack to cool fully before decorating. Warm cookies will melt your drizzle, so cooling is important.
7. Prepare the decorations
Peppermint shards: Place a few peppermint candies or candy canes in a ziplock bag and gently crush them with a rolling pin into small, colorful pieces.
Star toppers: If you have mini graham cracker stars, keep them ready to place on top of your trees. You can also use any mini star cookies or cut a few from leftover dough.
Candy trunks: Keep round peppermint candies handy for when you arrange the cookies into one large tree shape later, to use as trunks.
8. Decorate the cookies
Melt the white chocolate in short 10–15 second microwave bursts(pulse mode), stirring until smooth and pourable (it should look like condensed milk).
Transfer to a piping bag or ziplock bag with a tiny corner snipped off. Pipe wavy lines over each cookie to look like snow on tree branches.
While the chocolate is still soft, sprinkle red and green sprinkles and peppermint candy shards on top.
Gently press a mini graham cracker star on the tip of each cookie while the drizzle is still tacky, so it sticks well.
9. Assemble (optional but fun!)
To make a centerpiece, place all the cookies on a board in the shape of a large Christmas tree.
Add a few peppermint candies at the bottom to form the trunk, and a big star cookie at the top if you’d like.
Serve and enjoy.
Notes
This recipe makes about 23 cookies in total when rolled to 1/5 inch thickness. Each serving is roughly 2 cookies. The exact number may vary slightly depending on the size and shape of your cookie cutter and how thickly you roll the dough.
More Recipes:
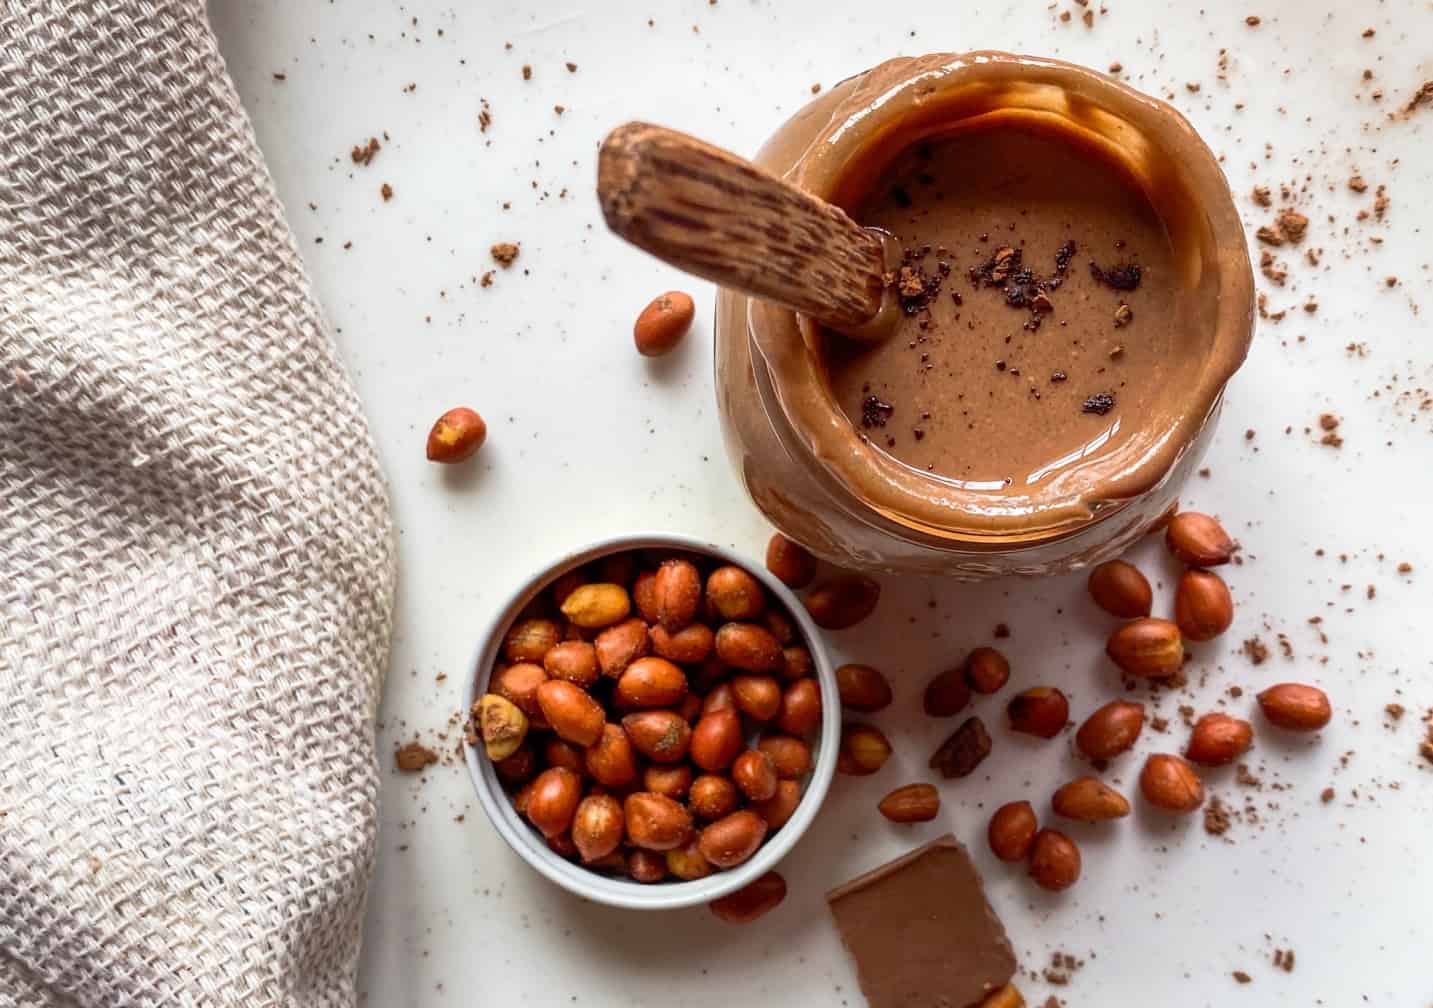
- Homemade chocolate peanut butter recipe
- How to make chia pudding (3 delicious recipes)
- 65 Christmas Appetizers that look Fancy but are Super Simple
- 28 healthy Christmas snack ideas the whole family can enjoy
- 80+ Thanksgiving Appetizers Everyone Will Gobble Up
- 118 Thanksgiving Side Dishes to Impress Your Guests
- Cozy Fall Dinner Recipe Ideas To Try This Season